Thursday over lunch I remembered I had a small dropper bottle of the Vallejo Wash I was waiting for. So why not use that and refill the bottle from the big tub when it arrives. Well done me! And it only took me a week to get to think of that... Anyway that gave me the chance to wash the bones and let them dry making it possible to finish this terrain project last night. Without further ado here are the bones for my Badlands Terrain set.
 |
| Now these are some bones to cower between. Or was that to take cover between? However you wish to use it, it is a finished set of badlands scatter terrain. |
First of the Vallejo Sepia wash is insanely good if you want to paint bones. It is slightly thicker than GW's Sepia, has a bit more brown mixed in with the yellow and it dries a with a more mat effect. I strongly suspect that John Blanche secretly uses this every time he mentions mixing a brown and yellow wash and covering his miniatures (then again as clearly evidenced from my paint work I'm not even in a league near him so what do I know). Anyway I had already spray painted the bones with a (nice and cheap) black undercoat followed by a coating with the Zandri Dust spray by GW. Making masterful use of my lack of foresight I did not take any photographs of these steps, so please close your eyes for a minute here and imagine the bones going from black to the dusty bone shade pictured below. Making hiss hiss sounds while imagining this is optional but recommended.
 |
| Applying Vallejo Sepia Wash to bones spraypainted Zandri Dust. |
After covering the bones in the Sepia wash (as expected I emptied the entire 17 ml bottle on these bones) I let them dry ending up with a collection of nice old, dirty looking bones.
 |
| I like this old bone look. |
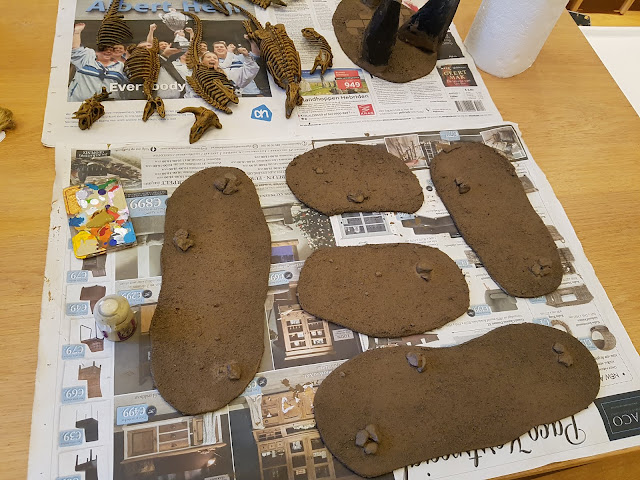
Next up where the bases. I already coated these with Steel Legion Drab from the
Cursed Wastes Scenery Paint Set and set them out to dry. Last night I put terrain set in front of me, switched the Warhammer TV show on in the background (making reruns possible was 5 dollars well spent, especially as the Thursday show with the behind the scenes people is very interesting), and got ready to do some painting.
 |
| Ready, set, PAINT!!! |
If anyone wonders what makes terrain building so great vs. army painting. Well five things. Let's do the internet thing and make a bulleted list out of it.
- You can try out new techniques without wasting models and on a bigger scale (making it easier to get the hang of it).
- Terrain painting allows you to (usually) get very nice results, fast. Terrain needs to be a bit muted to show of the models on it, so keeping it nice and simple is a plus. You don't often get stuck for months or years on one project.
- Building terrain gives you an excuse to reuse old toys, rework cheap and ugly things into cool new shapes (rather iffy dinosaur bones for instance) and to use some rougher materials like polystyrene, rocks and sand.
- Building terrain (especially scratch building terrain) gives you a wonderful excuse to go through the artwork and fluff of a system to get inspired.
- Playing Warhammer 40K and Age of Sigmar is fun, but by playing these games on a table with proper terrain you take it up to awesome. I like playing awesome games.
As for number 2 on the list above (fast), the next steps on this project took me an hour to achieve.
 |
| Drybrushing speeds things up, and works marvelously for terrain. |
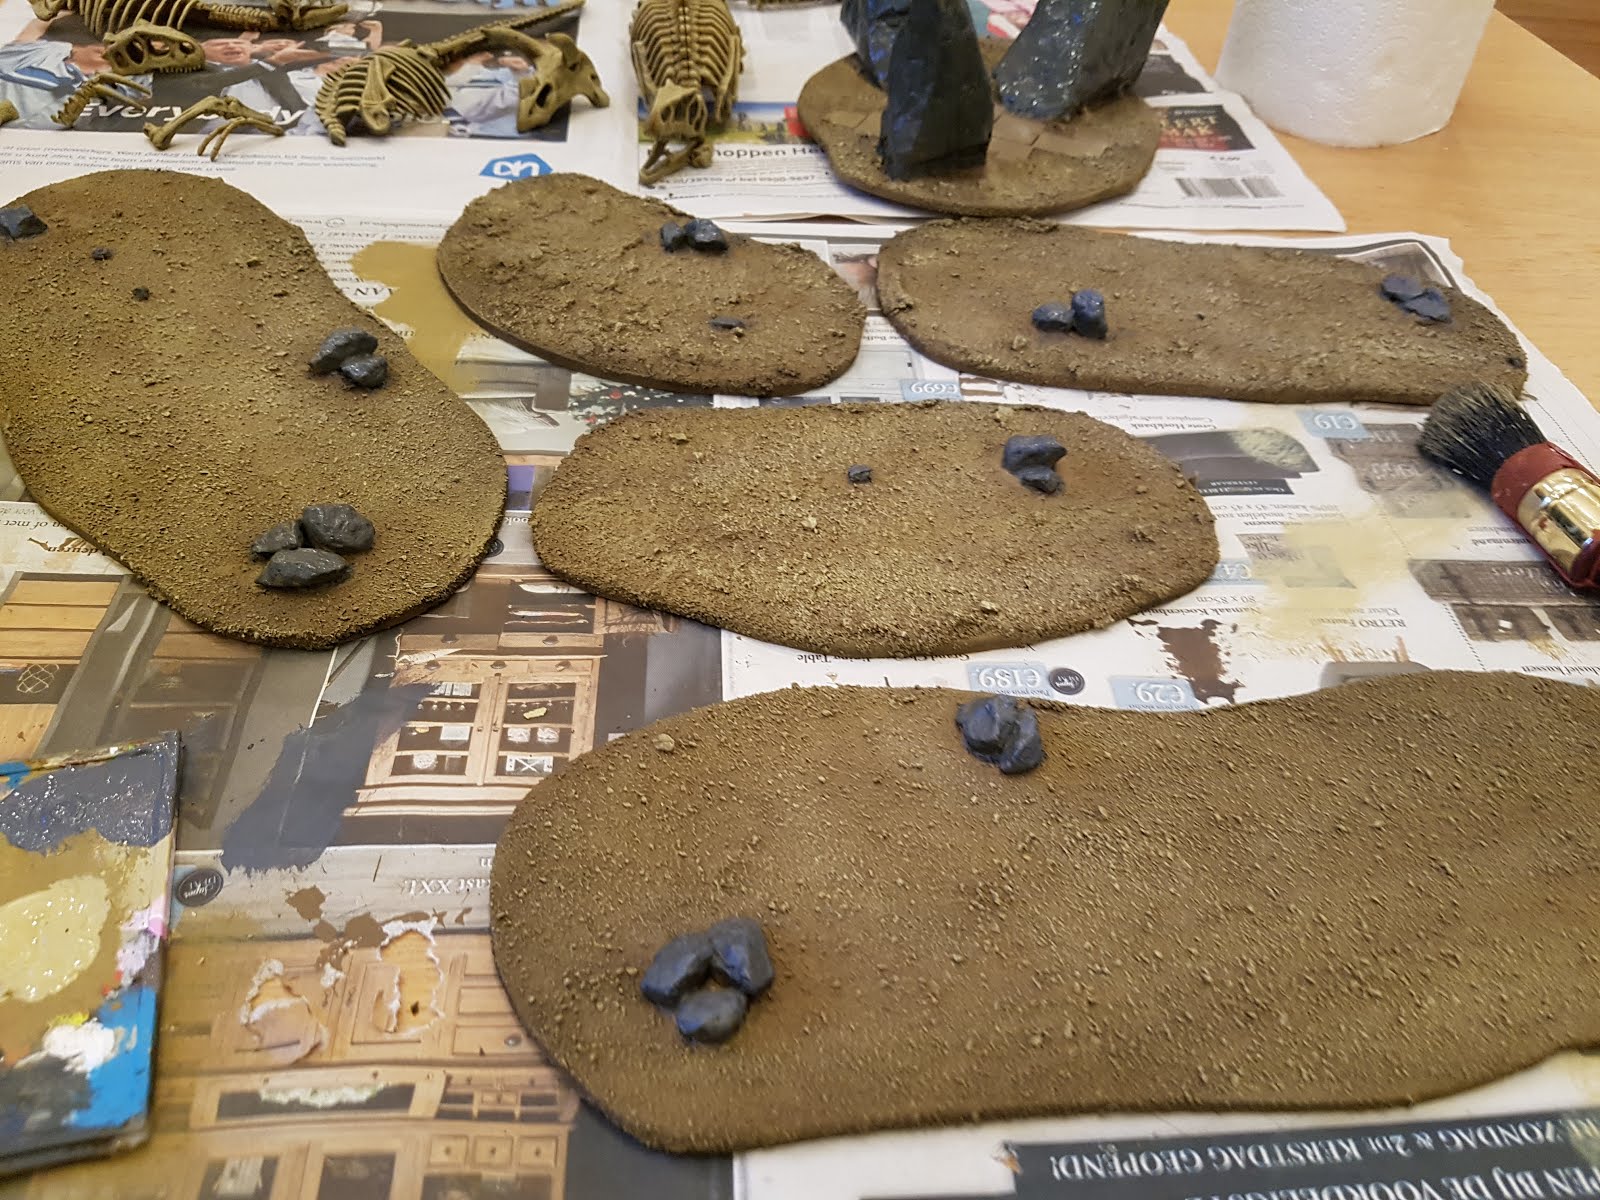
First step consisted of drybrushing all the sand bases and all the bones with Tallarn Sand (from the Cursed Wastes Scenery Paint Set) and followed up with Ushabti Bone (same source). Look at the (dry)brush on the right of this picture to get a sense of scale when working with scenery. It speeds things up wonderfully. I finished of by painting all the rocks (and the three monoliths) Skavenblight Dinge. Did not allow it to dry (impatient) and simply drybrushed Dawnstone over the half-dried grey paint (I used a smaller brush for this). As I got to the end of all the rocks they where dry enough for a final drybrush of Celestra Grey. I finished by painting the sunken tiles between the monoliths with Vallejo Wolf Grey and German Grey, mixing the two to get an in between color on some of the tiles.
 |
| Adding more PVA to stick flock to this. |
The bones are brownish/beige and the bases are almost the same color. That is not good as it give to little contrast. So I grabbed a stray bottle of PVA next and made pools on the bases where I wanted some grass to grow. I don't overthink this step but I do use it as a chance to cover up some of the uglier mistakes made while drybrushing (usually involving a drybrush overloaded with paint) and to cover up ugly construction mishaps that only pop out when you paint.
 |
| A tub of flock and an application tool, almost makes it look like a pro is working here. |
Next I use a static flock application tool built from an electric fly swatter and a tea sieve. I used
this instruction video by Girl Painting to build it. Cheers for that! The application tool helps the flock stand up slightly when you apply it, using a sieve also prevents you from putting too much flock on any one spot.
 |
| Yelling at glue to dry faster does not seem to do anything... |
After applying the flock I had to use some WIP pictures to figure out where I planned the bones on the bases. As you can tell by some of the white PVA spots, this took some trial and error (on a base with the flock still wet, I should have waited a day before I did this, but I didn't...). Next came the hard part, waiting for the bases to dry and the sun to come up to take some proper pictures. I'll show these in a separate second post.


Nice work! I've linked this in my article about dino skeletons - https://alkony.enerla.net/english/the-nexus/miniatures-nexus/miniature/miniature-creature/miniatures-animal-skeletons
ReplyDelete